Billing portals
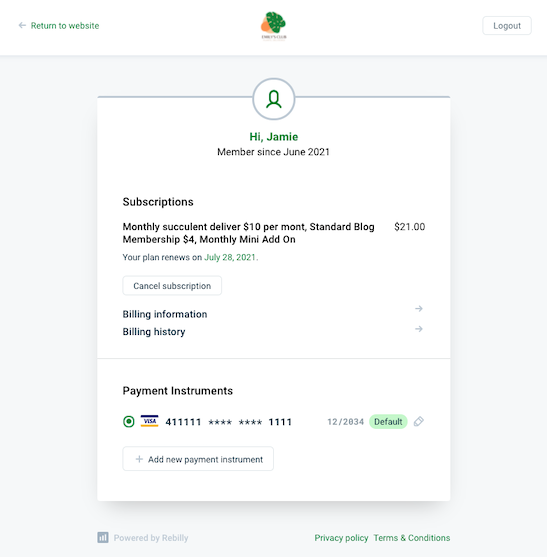
Use Billing portals to create secure, Rebilly hosted pages, where customers can: view invoices, cancel subscriptions, update payment instruments, and update their address.
Create a billing portal
Use this process to create a billing portal.
- In the left navigation bar, press Settings .
- In the Configuration section, press Billing portals.
- Press Create billing portal.
- In the Name field, enter a descriptive name for your billing portal.
- In the Website field, select the website where the billing portal will be displayed. If you have not configured a website, see Organizations & websites.
- Optionally, to select a custom domain for the billing portal, in the Custom domain field, select a custom domain. If you have not configured a custom domain, see Configure a custom domain.
- In the Slug field, enter a unique, human-readable string for the end of your billing portal URL.
- In the Features section, select the Orders and Payment instruments features that you want to enable for your customers.
- In the Customization section, add a logo and select colors to use in your portal.
- In the Footer links section, optionally add your: privacy policy, terms of service, and refund policy URLs to display in the footer.
- Press Save billing portal.
Rebilly supports the use of custom domains in billing portals, quotes, deposit requests and payouts. Instead of using the default Rebilly domain: portal.secure-payments.app, you can use your own. For more information, see Configure a custom domain.
Manage billing portals
Use this process to view, edit, copy, preview, and delete billing portals.
- In the left navigation bar, press Settings .
- In the Configuration section, press Billing portals.
- Select from the following:
- Clone a billing portal: On the right of a portal, press Clone .
- Copy a billing portal URL: On the right of a portal, press Copy URL.
- Edit a billing portal: On the right of a portal, press Edit .
- Delete a billing portal: On the right of a portal, press Delete .
- Preview a billing portal: On the right of a portal, press Copy URL, then open the URL in a browser.
Filter billing portals
Use this process to filter billing portals in the Billing portals page.
- In the left navigation bar, press Settings .
- In the Configuration section, press Billing portals.
- In the top right of the billing portals table, press Filters .
- In the Filter dropdown, select a filter.
- In the Operation dropdown, select a condition.
- In the Filter field, enter or select values.
- Press Apply filter.
Generate and share a billing portal URL
Use this process to generate a billing portal URL that will be shared with a customer. The customer can use this URL to put a new card on file, or update their address in advance of a renewal.
This process is commonly used by Customer Support Representatives. The unique link can be used in customer emails or live chat.
- In the navigation bar, press Data tables, and press Customers.
- In the list of customers, select the customer that you want to share the billing portal link with.
- In the top right of the screen, press , then press Billing portal.
- Copy the URL and share it with the customer.