Checkout forms
Use Rebilly hosted checkout forms to provide secure and compliant checkouts, that are easy to set up and do not require developer experience. Checkout forms are customizable, and use fully responsive design, built-in error messaging, validation, and expedited checkout for returning customers.
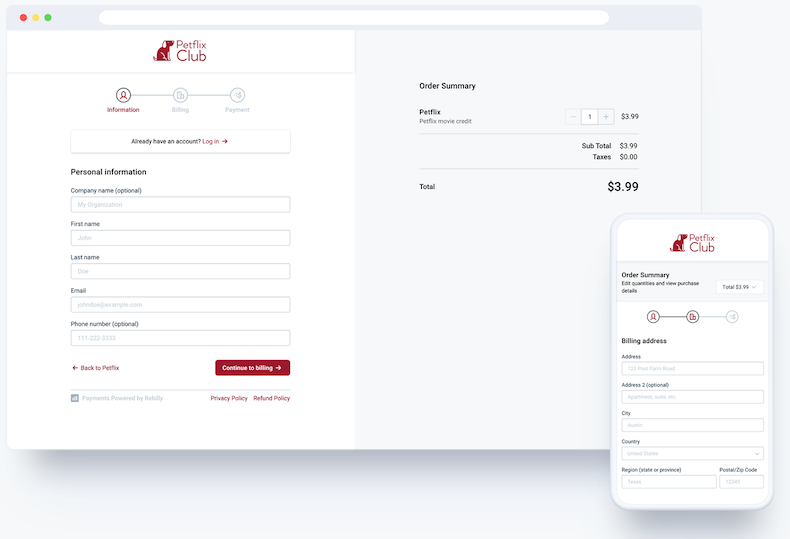
For an interactive example, see Example checkout.
Create a hosted checkout form
Use this process to create a hosted form and add it to your website.
In the left navigation bar, click Settings .
In the Payment forms section, click Checkout forms.
Click Create checkout form.
Optionally, to select a custom domain for the checkout form, in the Custom domain field, select a custom domain. If you have not configured a custom domain, see Configure a custom domain.
Complete the form, then click Save checkout form.
Locate the checkout form at the top of the list checkout forms, then on the right, click Preview .
Create a checkout button and add it to your web page.
Example:
<a class="button" href="link-to-checkout-form">Buy now</a>
a.button {
   -webkit-appearance: button;
   -moz-appearance: button;
   appearance: button;

   display: inline-block;
   background: #0044d4;
   color: #ffffff;
   padding: 10px 20px;
   border-radius: 6px;
   text-decoration: none;
   color: initial;
}
Rebilly supports the use of custom domains in hosted checkout forms, billing portals, quotes, deposit requests and payouts. Instead of using the default Rebilly domain: portal.secure-payments.app, you can use your own. For more information, see Configure a custom domain.
Test a hosted checkout form
Use this process to test a payment in a hosted payment form.
- Obtain the Rebilly checkout form redirect URL:
- In the left navigation bar, click Settings .
- In the Payment forms section, click Checkout forms.
- On the right of your form, click Preview .
- Test the checkout form: Complete the form and use the following card details to execute a test transaction. Note: This card will not generate a real charge.
- Card number: 4111 1111 1111 1111
- Expiration date: Use any future date.
- CVV: Use any 3 digits.
Manage checkout forms
Use this process to copy, preview, and delete checkout forms.
- In the left navigation bar, click Settings .
- In the Payment forms section, click Checkout forms.
- Select from the following:
- Copy a checkout form URL: On the right of a checkout form, click Copy URL.
- Clone a checkout form: On the right of a checkout form, click Clone .
- Preview a checkout form: On the right of a checkout form, click Preview .
- Edit a checkout form: On the right of a checkout form, click Edit .
- Delete a checkout form: On the right of a checkout form, click Delete .
Filter checkout forms
Use this process to filter checkout forms in the checkout forms page.
- In the left navigation bar, click Settings .
- In the Payment forms section, click Checkout forms.
- In the top right of the checkout forms table, click Filters .
- In the Filter dropdown, select a filter.
- In the Operation dropdown, select a condition.
- In the Value field, enter or select values.
- Click Apply filter.