Create a direct integration
Integrate directly with Rebilly using our API.
To use this integration method for live payments, you must be PCI-DSS compliant.
If you are not PCI-DSS compliant, you may still test this integration in the sandbox environment using payment cards described in Test payment cards, IBANs, and ACH details. For live transactions, please check out one of our other integration methods integrations that use our FramePay solution to safely and securely capture sensitive payment information.
In this guide, we'll interact with the API to complete a transaction in 3 steps:
- upsert a customer
- create a payment instrument
- create a transaction
This guide will take about 10 minutes.
To do this, you should have already gone through the getting ready prerequisites.
Upsert customer
First, we will upsert the customer. It is a best practice to upsert the customer. In the case of a duplicate customer ID, the customer record will be updated.
You'll need:
- Your
websiteId - Your
organizationId - Your secret API key - Note: this will be pre-populated if you are logged into the Rebilly app in the sandbox environment.
Go to the upsert a customer with a predefined ID API, and use the "Try it" console to create your customer.
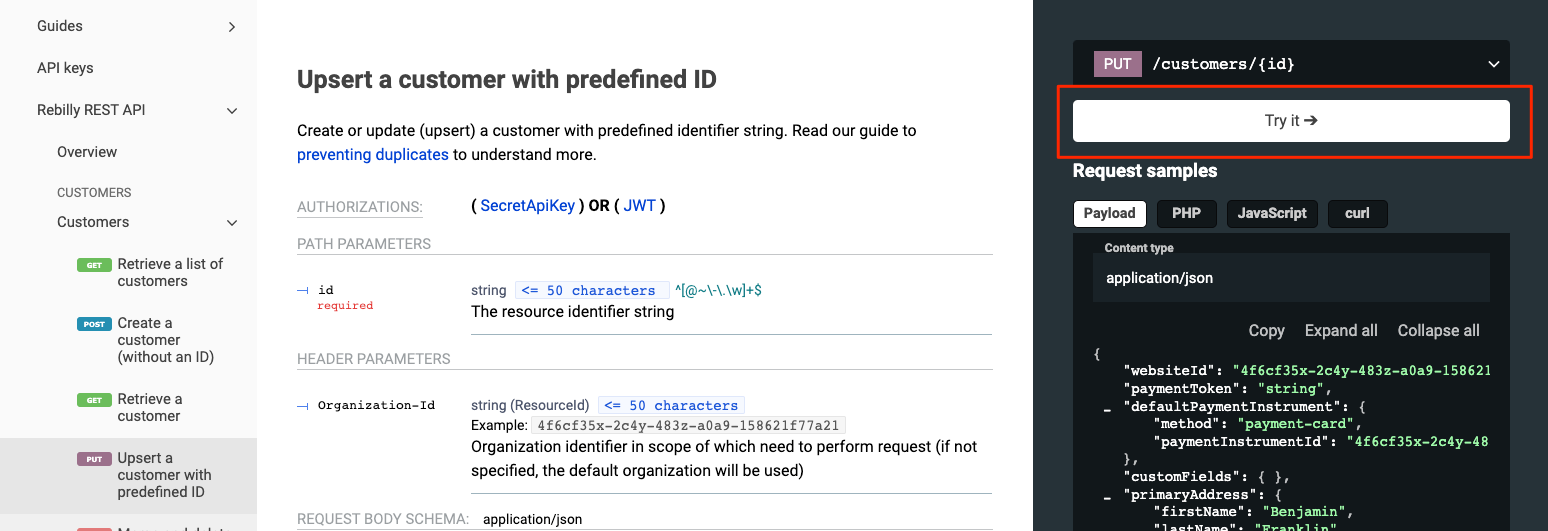
Body
Only a few pieces of information are required at this point. In this example, we are using Redocly as our organization, and our customer is Albert Einstein.
Replace redocly.com with your own website ID.
{
  "websiteId": "redocly.com",
  "primaryAddress": {
    "firstName": "Albert",
    "lastName": "Einstein"
  }
}
Parameters
In the parameters tab, add your customerId and the organizationId.
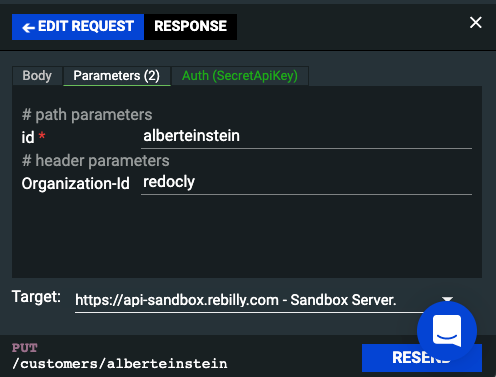
Before you press send, be sure that your target is set to the correct environment. The target is set as the sandbox server by default.
Press send to submit your request.
Response
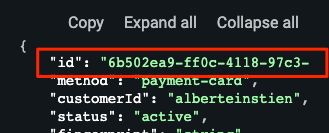
We created our customer. Now, let's inspect that API response.
The customer has an id, and that should match what we supplied in the path parameter of the PUT request to upsert the customer.
Create payment instrument
Next, we will create a payment instrument. This step generates a payment instrument ID that will be used to create the transaction.
You'll need:
- Your
organizationId - The
customerIdyou created in the first step - A test payment instrument (provided below). However, you may use any of the payment cards described in Test payment cards, IBANs, and ACH details.
Go to the create a payment instrument API and use the "Try it" console to create a payment instrument.
Body
Enter the customerId you generated in the first step.
Specify the method as payment-card. Then, enter the paymentInstrument PAN, CVV, and expiration date. In this example, we will use our test card for an approved transaction: 4111111111111111 with any future expiration date and any 3 digit CVV.
Finally, enter a billing address for your customer.
{
  "customerId": "alberteinstein",
  "method": "payment-card",
  "pan": "4111111111111111",
  "cvv": "123",
  "expMonth": 4,
  "expYear": 2025,
  "billingAddress": {
    "firstName": "Albert",
    "lastName": "Einstein",
    "organization": null,
    "address": "1 Plainsboro Rd",
    "address2": "null",
    "city": "Plainsboro Township",
    "region": "New Jersey",
    "country": "US",
    "postalCode": "08536"
  }
}
Parameters
Under the parameters tab, enter your Organization-Id.
Then, press send.
Response
We created our payment instrument. Now, inspect the API response. The response contains an id. This is the paymentInstrumentId. Save this ID to be used in the final step.
Create transaction
Next, we'll create a transaction using the customer and payment instruments created in the previous steps.
You'll need:
- Your
websiteId - Your
organizationId - The
customerIdyou created in the first step - The
paymentInstrumentIdyou created in the second step.
Go to the create a transaction API and use the "Try it" console to create a transaction.
Body
Enter your websiteId and customerId.
You can create the transaction for any amount, and any currency that is supported by your TestProcessor. For this example, we'll use $50 USD as our amount and currency.
Under the payment instruction, we will be using a payment instrument. Replace the paymentInstrumentId with the ID you generated in the previous step.
The requestId can be any string of values, but it must be unique for each transaction created. If you create multiple transactions, enter a unique requestId for each request.
The notificationURL and redirectURL are important for supporting offsite payments. For this example, we will leave the default URLs, http://example.com.
{
  "websiteId": "redocly.com",
  "customerId": "alberteinstein",
  "currency": "USD",
  "amount": 50,
  "paymentInstruction": {
    "paymentInstrumentId": "6b502ea9-ff0c-4118-97c3-9e7f09c33d90"
  },
  "requestId": "1234",
  "notificationUrl": "http://example.com",
  "redirectUrl": "http://example.com",
  "isProcessedOutside": false,
  "type": "sale"
}
Parameters
Under the parameters tab, enter your Organization-Id.
Then, press send.
Response
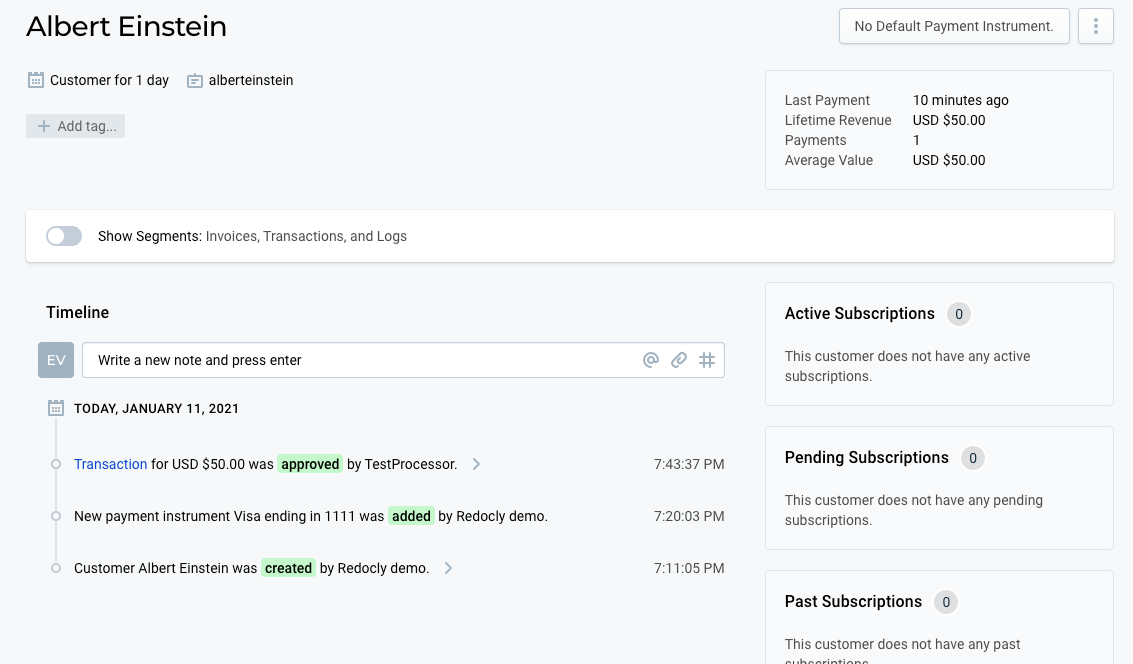
Your transaction is complete! In the response, you can see the result of your transaction.
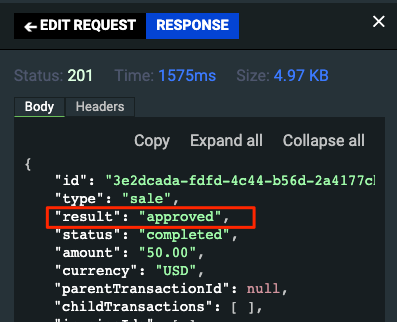
Check the customer record in the Rebilly app, and you will see all of the steps recorded in the customer timeline.
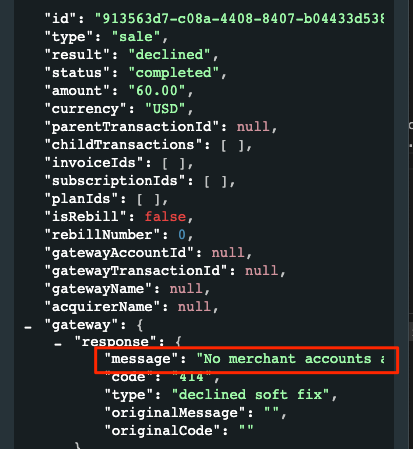
Tip: If you receive a declined result with the reason No merchant accounts available for this transaction, double check your gateway account settings in the Rebilly app. Be sure that you have an active gateway configured to accept transactions for this currency, payment method, and website ID.
You can test other types of results, such as a declined result by repeating step 2 and 3 using different payment cards that are described in Test payment cards, IBANs, and ACH details.